Grow Garlic in Pots – Growing your own garlic is not just a gardening task; it’s a rewarding experience that can elevate your culinary creations. Imagine the satisfaction of harvesting your own flavorful garlic, a variety often richer than what you find in the grocery store. If you’re wondering how to grow garlic in pots, you’re in the right place! In this article, I’ll guide you through every step of the process, from selecting the right garlic and containers to harvesting your bountiful crop. Whether you’re a seasoned gardener or a beginner, this guide will help you successfully grow garlic in pots and enjoy the fruits of your labor.
Garlic Growing Basics
Understanding the Growing Duration
Garlic has a long growing season, typically taking 8 to 9 months from planting to harvest. Yes, it’s a long commitment, but think of it as nurturing a relationship. Just like waiting for a good friend to arrive, the wait for your garlic is worthwhile! You could even grow garlic in pots in the same time frame (kidding, of course!). In cooler climates, the best time to plant garlic cloves is in the autumn, usually around your first frost. When you grow garlic in pots, you’ll be rewarded with a robust harvest the following summer.
Types of Garlic for Containers
When it comes to how to grow garlic in pots, choosing the right type of garlic is crucial. There are two main varieties to consider: hardneck and softneck.
Hardneck Garlic
- Best for Cold Climates: If you live where winters bite, hardneck garlic is your go-to. These varieties are hardy and thrive in colder conditions.
- Sprouting Requirements: They require 6 to 8 weeks of temperatures below 45°F to sprout. If your winter doesn’t cooperate, don’t worry; you can still grow them!
Softneck Garlic
- Best for Mild Climates: Softneck garlic is better suited for milder areas.
- Pre-Chilling Option: If your temperatures don’t dip enough, you can pre-chill hardneck garlic by placing the bulbs in a paper bag in your fridge for about 8 weeks before planting. It’s like giving them a “fake winter” to help them grow.
Selecting a Container
Now that you’ve picked your garlic variety, it’s time to think about containers. This step is crucial for successful growth.
Container Type
While terra cotta pots are popular, they’re not the best choice for garlic. Their porous nature can lead to frequent watering, and they may crack in winter. Instead, consider these materials:
- Plastic
- Glazed Ceramic
- Fiberstone
- Plasti-stone
Container Requirements
When selecting a pot, keep these requirements in mind:
- Drainage Hole: Your container must have a drainage hole to prevent waterlogging.
- Depth: Choose a pot that’s at least 8 inches deep to allow for adequate root growth.
- Diameter: The pot’s diameter should accommodate how many cloves you want to plant. For instance, a 22-inch diameter pot works well for 8 to 10 cloves. Remember, a larger pot means less frequent watering—a win-win!
Soil Requirements
Choosing the right soil is often overlooked but is critical for your garlic’s success.
Soil Mix
Garlic thrives in a well-drained soil mix to prevent clove rot, especially if you live in a wet climate. I recommend a mix that consists of:
- 75% Potting Soil
- 25% Compost
This combination provides the nutrients garlic needs to flourish.
Fertilizer
Garlic is a bulb plant, which means it requires the right nutrients to grow healthy and robust heads.
Fertilization
- Type: Use 2 to 3 tablespoons of a granular organic fertilizer high in phosphorous, like BulbTone.
- Mixing: Stir the fertilizer into your soil mix evenly to ensure your garlic gets all the necessary nutrients from the start.
Planting Process
Timing
The best time to plant garlic in pots is around your first frost. This timing helps your garlic acclimate to the cooler temperatures it craves.
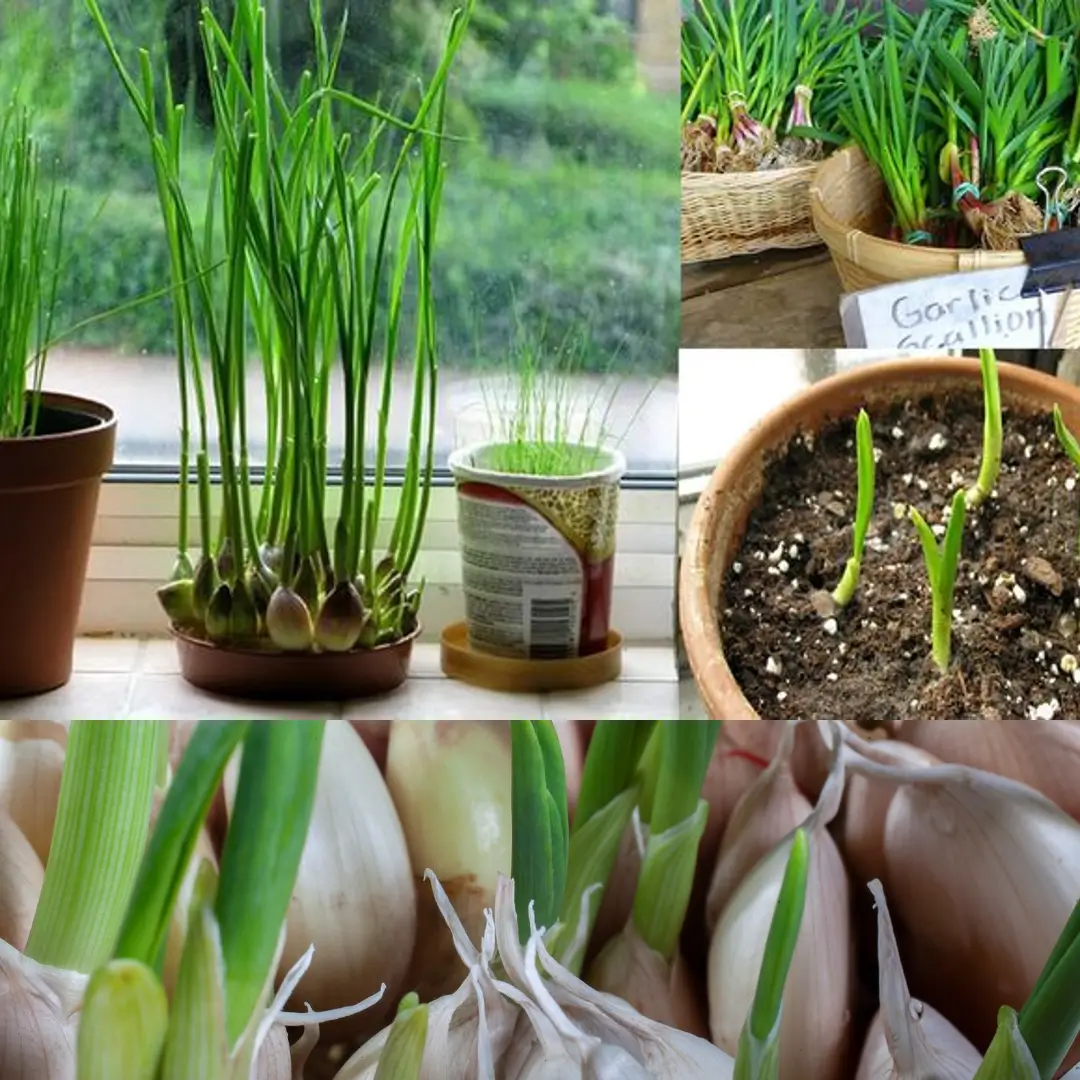
Clove Preparation
Before planting, split the head of garlic into its individual cloves, selecting the largest ones for planting. Remember, don’t be shy; you won’t hurt them!
Planting Depth
- How Deep: Sink each clove into the soil with the pointy end facing up. Each clove should be about 3 inches deep.
- Spacing: Space the cloves 3 to 4 inches apart. Don’t cram them together; they need room to grow!
Mulching
After planting, water the pot well and add a 1 to 2-inch thick layer of mulch on top. I recommend using straw or finely shredded leaves. This mulch layer helps insulate the bulbs during the winter, keeping them cozy.
Winter Care
Location
Place your pot of garlic in a sunny spot that receives at least 6 to 8 hours of full sun per day. If you live in a mild climate, you can leave it in that sunny spot all winter long.
Cold Climates
If you experience cold winters, it’s wise to move your pots to a sheltered area next to your house. To insulate the soil and bulbs, pile some fall leaves or straw around the sides of the container, avoiding the top. You can even wrap the pot in a few layers of bubble wrap for added insulation. It’s like giving your garlic a warm hug!
Spring and Summer Care
When spring arrives, it’s time to bring your garlic back into the sunshine and resume regular care.
Watering
It’s essential to keep your pot watered throughout the garlic’s life cycle. Yes, that means you’ll be watering occasionally for the next 8 to 9 months, including winter watering if the soil isn’t frozen. Trust me; keeping that soil moist is key!
Fertilizing
In early spring, sprinkle an additional 2 tablespoons of granular organic bulb fertilizer on top of the soil. This helps ensure that your garlic gets the nutrients it needs as it starts to grow.
Scapes
If you’ve planted hardneck garlic, you’ll notice it produces a curly flower stalk known as a scape in early summer. Snap off the scape to redirect the plant’s energy into growing a larger bulb. Think of it as a way of saying, “Let’s focus on what really matters!”
Harvesting
Harvest Time
Garlic leaves typically start to yellow in early summer. Once they’re 50% yellow, usually around early or mid-July, it’s time to harvest!
Method
To harvest, simply dump out the pot and unearth those glorious heads of garlic. The anticipation is over; now you can enjoy the fruits of your labor!
Growing garlic in pots may seem like a long-term commitment, but the results are absolutely delicious. Not only do you get to enjoy the rich flavors of homegrown garlic, but the process is incredibly rewarding. So, gather your pots, select your garlic, and start your gardening adventure. You’ll be glad you did! Embrace the journey of learning how to grow garlic in pots, and soon enough, you’ll be savoring the fruits of your labor right from your own garden!
FAQs
What is the best month to plant garlic?
The best month to plant garlic is typically in the autumn, around the first frost, depending on your climate. If you want to successfully grow garlic in pots, in cooler areas, aim for mid-October to early November, while in milder climates, you might start planting as late as December.
How long does it take to grow a full bulb of garlic?
Growing a full bulb of garlic usually takes about 8 to 9 months from planting to harvest. After planting in the fall, you can expect to grow garlic in pots and harvest in the following summer, typically between June and August, depending on the variety and your local climate.
What is the best container for growing garlic?
The best container for growing garlic is one that is at least 8 inches deep and has a diameter of 22 inches for multiple cloves. To effectively grow garlic in pots, it’s essential to choose non-porous materials like plastic, glazed ceramic, or fiberstone to ensure proper drainage and prevent cracking in colder weather.
Why does garlic take so long to grow?
Garlic takes a long time to grow because it goes through several growth stages, including establishing roots, sprouting, and bulb formation. To grow garlic in pots, it’s essential to understand that garlic needs a chilling period in winter to develop the necessary energy for bulb growth. This is why it requires 8 to 9 months from planting to harvest.