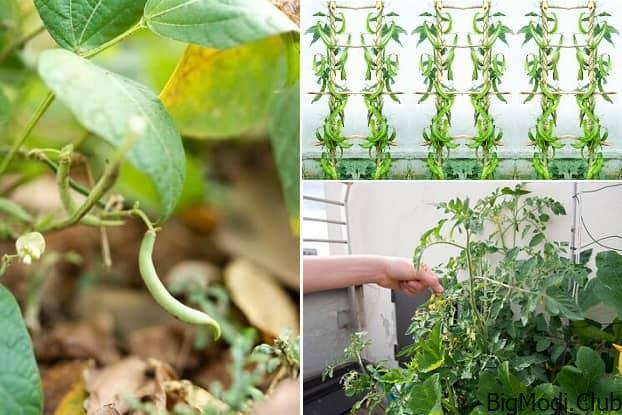
To achieve the best results with growing winged beans, understanding the ideal conditions and care practices is crucial. From sowing the seeds to harvesting the mature beans, this guide will walk you through each step to ensure your winged bean plants thrive. Let’s dive into the essentials of growing winged beans and discover how you can cultivate this remarkable crop in your garden.
When to Sow Winged Bean Seeds
Timing and Temperature
Winged beans thrive in warm conditions. To ensure successful germination, it’s crucial to sow seeds when the soil temperature is between 25-30°C. This warm environment is essential for seed growth. Additionally, winged beans are sensitive to frost. Therefore, sowing or transplanting should only occur after the last frost has passed to avoid damaging the plants.
Preparation
Perennial Nature: Although winged bean plants can live for several years, they are typically grown as annuals in cooler climates. This means you should choose a permanent location where they can flourish uninterrupted.
Sunlight Requirement: These plants need ample sunlight. Aim to position them where they will receive at least 6 hours of full sun each day.
Soil Preparation: A well-drained, nutrient-rich soil is vital for winged beans. Prepare your soil by thoroughly weeding and loosening it, then enrich it with aged animal manure or compost. This will provide the necessary nutrients and support for healthy growth.
How to Sow Winged Bean Seeds
Scarification: To boost germination rates, consider scarifying the seeds before planting. This process involves making a shallow nick in the seed coat or lightly rubbing the husk with sandpaper or a nail file. Scarification helps water penetrate the seed, enhancing the germination process.
Sowing Method: Start by filling trays or containers with a quality seed-raising mix or soil starter pellets. Sow the seeds 20mm deep. Maintain soil moisture—keep it moist but not overly wet or dry. Germination typically occurs within 7-21 days.
Transplanting: Once the seedlings have their first true leaves and are 5-10cm tall, they are ready to be transplanted. Space them 25cm apart, with rows set 100cm apart, to give each plant ample room to grow.
How to Grow Winged Beans
Watering: Regular watering is essential. Check the soil 5cm below the surface—water when it feels dry. It’s best to water in the early morning or late afternoon to minimize evaporation and avoid fungal issues. Be cautious not to wet the leaves, as this can lead to diseases.
Fertilization: If your soil was well-prepared with compost or manure, additional fertilization might not be necessary. However, in less nutrient-rich soils, a balanced fertilizer can help. Apply slow-release fertilizer at planting and liquid fertilizer during fruiting or flowering stages.
Support: Winged beans need support to grow effectively. Install a trellis or strong support structure and gently tie the plants to it using twine or plant ties. This prevents root disturbance and supports the plant’s climbing growth.
Cold Weather Care: In cooler climates, winged bean plants may die back during winter. Cut them back just above ground level in late autumn, or prune off dead foliage as new leaves emerge in spring.
How to Harvest Winged Beans
Harvest Timing: Winged beans are typically ready to harvest between 120-240 days after sowing. All parts of the plant are edible—leaves, flowers, pods, young seeds, and tubers.
Pods: Harvest pods when they reach 5-10cm in length. Regular harvesting encourages continued pod production. Use snips or secateurs to cut the pods, and store them in a perforated plastic bag in the fridge for short-term use.
Leaves and Flowers: Young leaves are excellent in salads or as a spinach substitute. Flowers can be harvested when fully open to add color and flavor to rice dishes.
Tubers: Harvest tubers in autumn, when the plants begin to die back. Use a garden fork to gently lift them from the soil, shaking off any excess dirt. Tubers tend to grow larger in cooler climates.
Common Problems when Growing Winged Beans
Tough Pods: Harvesting pods too late can result in tough, unappetizing beans. Aim to pick pods while they are still young and tender. This will also encourage the plant to produce more pods.
Bacterial Leaf Spot: This disease manifests as irregular brown spots on the plant’s leaves and can cause premature leaf and flower drop. To manage it, water at the soil level, remove fallen leaves, and practice crop rotation.
Downy Mildew: Look out for yellow to grey-brown patches on the undersides of leaves. This fungal disease can be mitigated by watering at the soil level, removing affected leaves, and ensuring good air circulation. Persistent issues may require a fungicide or homemade milk spray.
Frost Damage: Frost can cause leaves to wilt and turn black. Prevent frost damage by delaying planting until after the last frost and harvesting before winter sets in. Remove frost-damaged leaves to prevent rot.
Powdery Mildew: This fungal issue starts as white spots on leaves and can spread rapidly. Prevent it by watering at soil level, allowing good air flow between plants, and removing affected leaves. If necessary, treat with an appropriate fungicide or homemade spray.


